La idea no era sólo la de plantarlas, verlas crecer y llevárselas a casa.
Quería que observasen y analizasen con detenimiento el proceso, viesen los pequeños cambios, conociesen la maravilla que puede suponer una creación de la propia naturaleza y aprendiesen ciertos conocimientos relacionados con este proceso de crecimiento.
Por ello, estuvimos bastante tiempo observando la transformación, pensando en los motivos de los cambios y conociendo sus porqués.
En nuestro caso, decidí plantar judías (habichuelas) blancas normales de paquete de las que comemos.
Seguimos un proceso que al final plasmamos en una línea del tiempo, pues todo está relacionado con el paso del tiempo y los cambios que se producen durante su transcurso.
A los niños les encantaba ver cómo poco a poco esas simples semillas blancas cobraban vida de forma tan sencilla.
Nos preguntábamos: ¿qué es una semilla? ¿está viva? ¿qué necesita para crecer? ¿qué cambios sufre? ¿en qué se convertirá? ¿qué partes tiene? ¿para qué sirven? ¿qué utilidad tienen?
(Aquellos que alguna vez me habéis comentado que lo habéis intentado sin éxito porque no crecían, se pudrían, daban mal olor, o se llenaban de mosquitos, os doy un secretillo: poned un papel absorbente entre el algodón y la semilla, y echad muuuuuy poquita agua. Veréis como crecen sin dar ningún problema)
Aquí os enseño el proceso:
Planting a seed is a very common activity in Early Childhood Education. I love to teach the children the process related to nature and the world around them, so it was impossible not to plant beans in this course.
The idea was not only to plant them and let them grow and take them home.
I wanted the children to observe and analyse the process carefully, seeing the small changes, they knowing the wonder that can be a creation of nature itself and learning certain knowledge related to the process of growth.
The idea was not only to plant them and let them grow and take them home.
I wanted the children to observe and analyse the process carefully, seeing the small changes, they knowing the wonder that can be a creation of nature itself and learning certain knowledge related to the process of growth.
That´s why we gave a lot of time observing the changes, thinking about the reasons for the changes and knowing their causes.
In our case, I decided to plant normal white beans which we normally eat.
In our case, I decided to plant normal white beans which we normally eat.
We continue a process that ultimately form part of a time line, because everything is related to the passing of time and the changes that occur during the course.
The kids loved watching how those simple white seeds grow and came to life in such a simple way.
We wondered: what is a seed actually? Is it alive? What does it need to grow? What changes do it suffer? What will it become? What parts does it have? What are they for?
(Those who once have commented that they have tried without success because the seeds didn´t grow, they rotted, gave bad smell, or were filled with mosquitoes, I will give you a little secret: put a tissue paper between the cotton and the seed, and pour very little water. You will see them grow without any problem)
Here I show you the process:

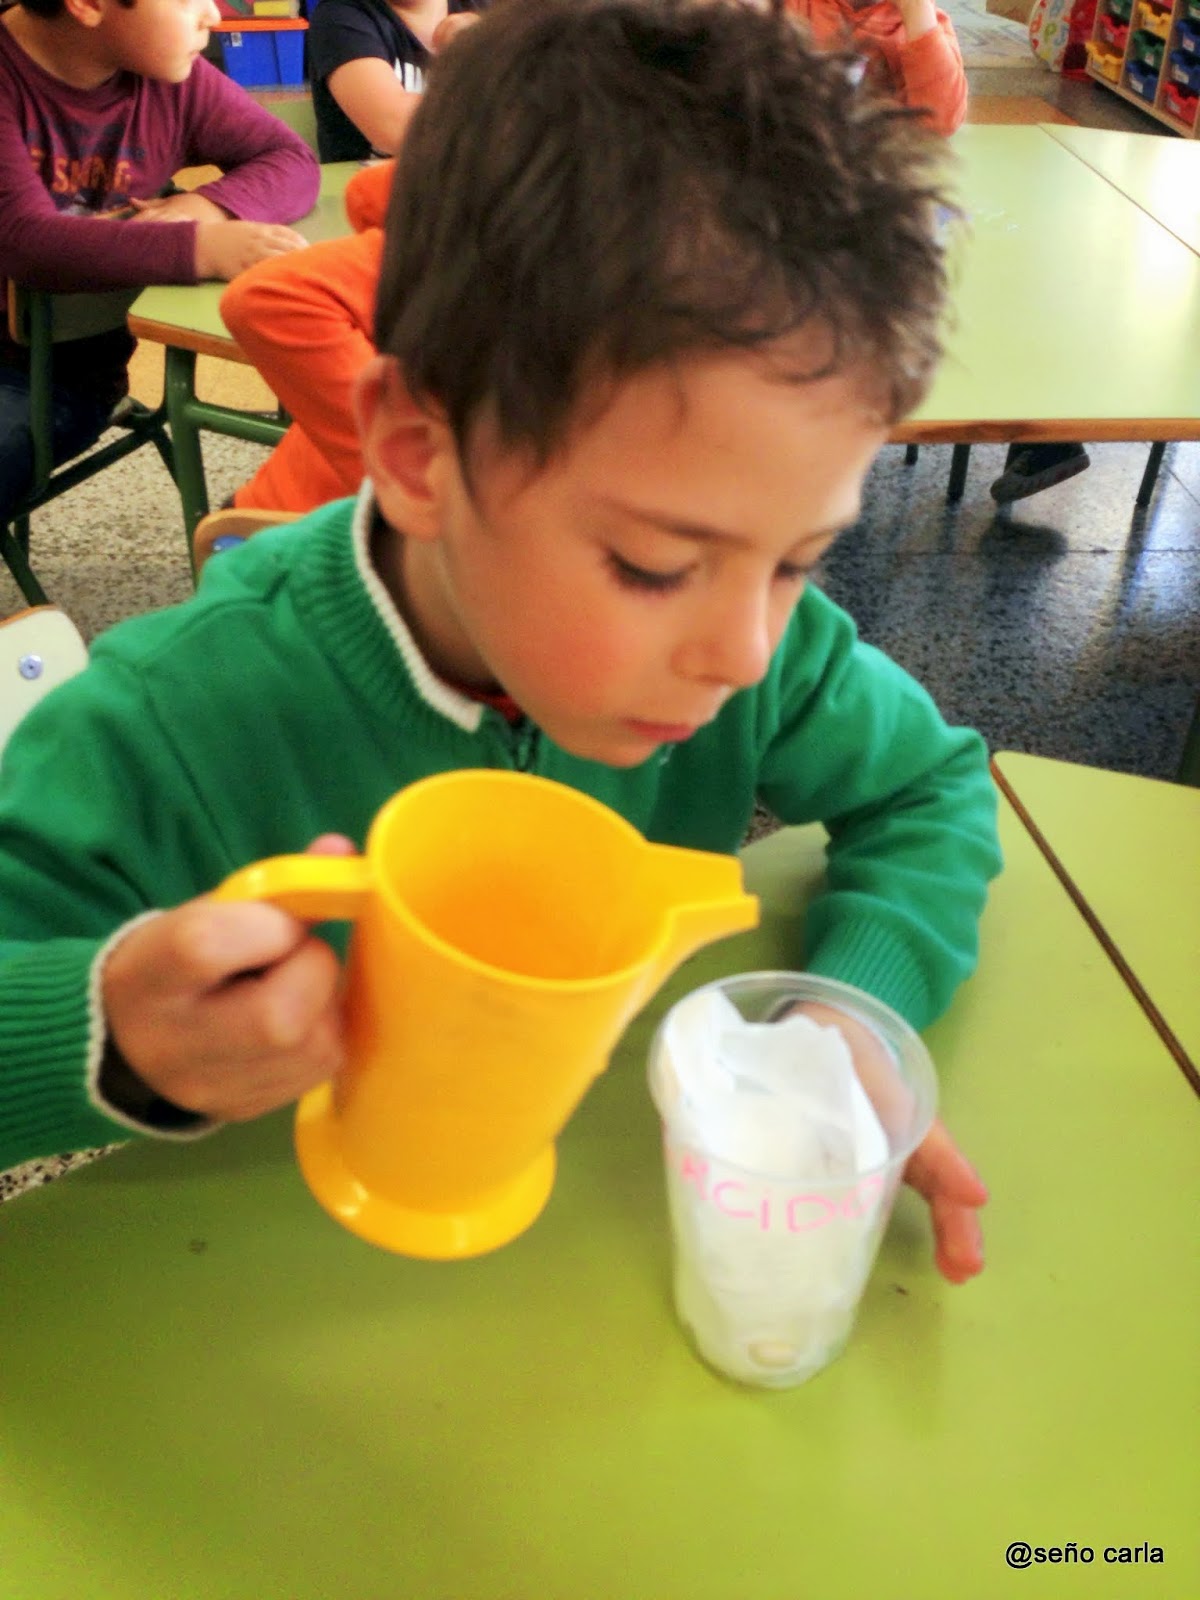
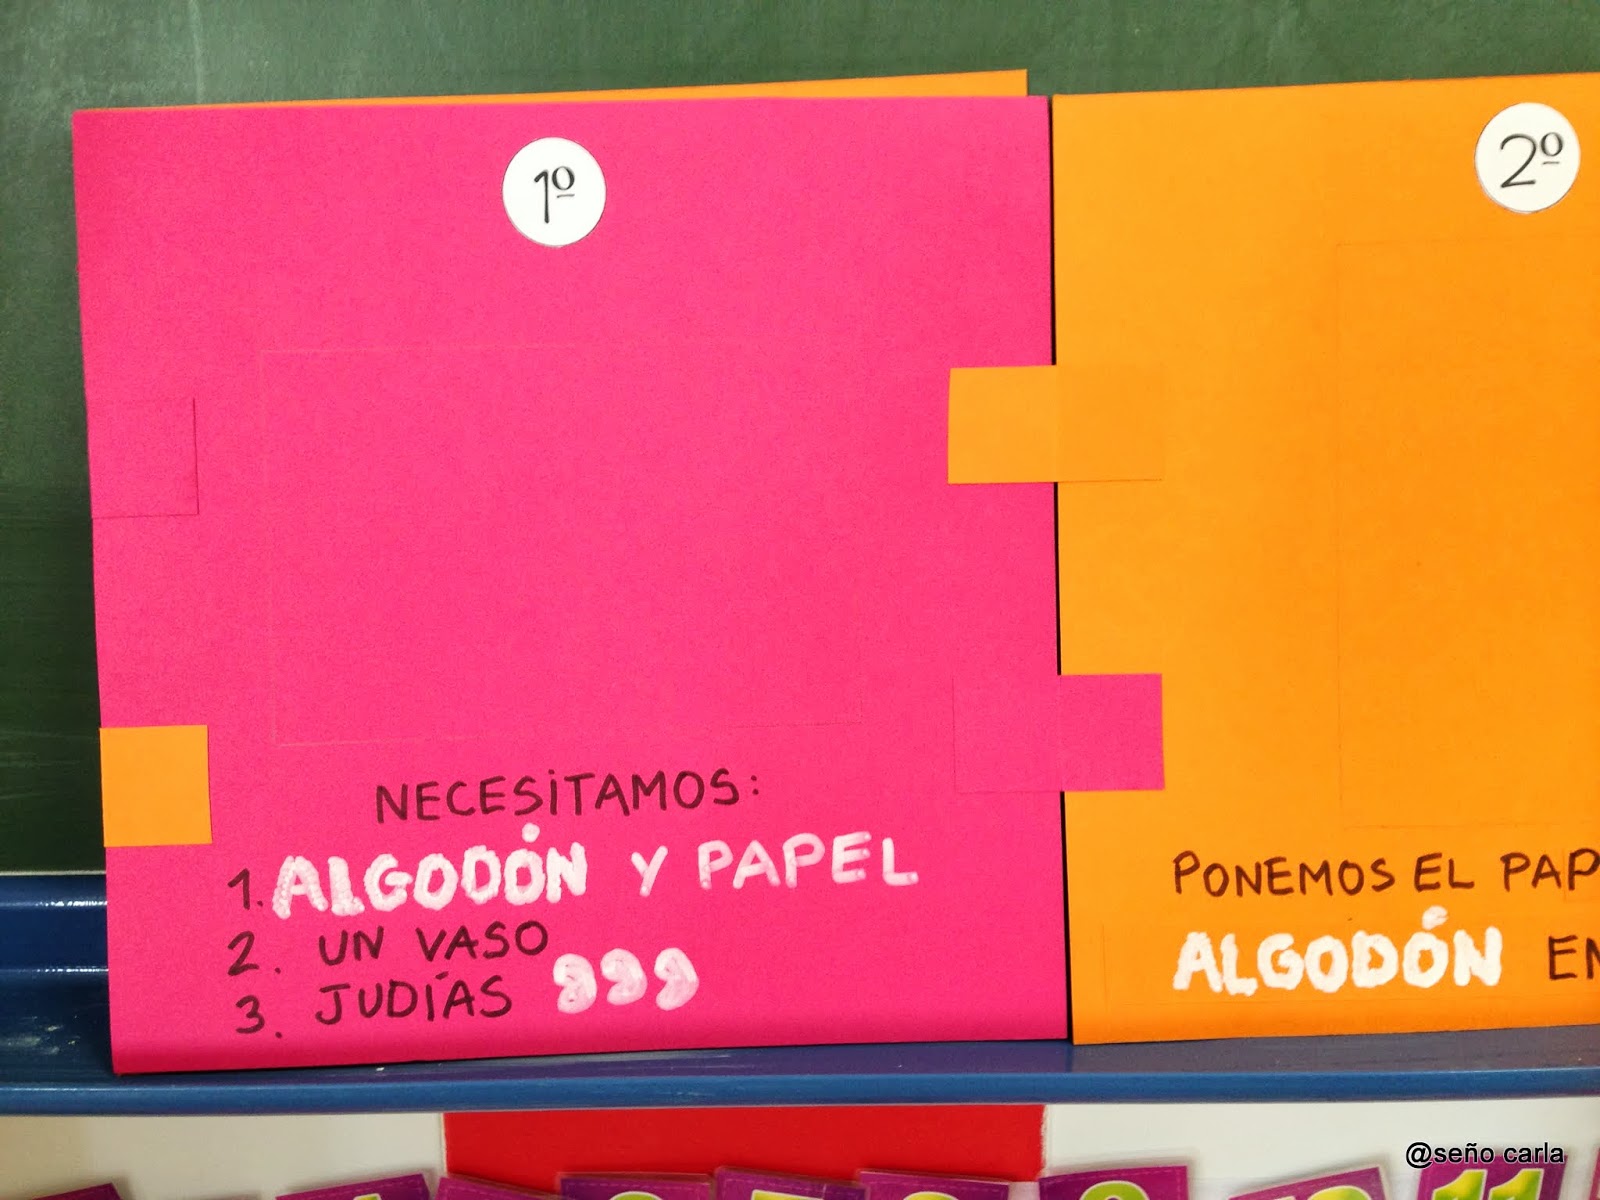
Preparamos las cosas que necesitamos
We prepare the things we need

Ponemos papel y algodón en el vaso. Nada de tierra. No la necesitamos todavía
We put paper and cotton in the glass. No soil. We don't need it yet

Plantamos 3 judías cada uno
We planted 3 buenas each

Todos tenemos nuestras propias plantitas.
All of us have our own plants.

Después de meter el papel y el algodón, regamos
After putting the paper and the cotton, we watered the plants


Ya tenemos las semillas listas
The seeds are ready

De la judía sale una pequeña raíz. Parece un gusanito
The bean is sprouting up. It's something lime a worm

La raíz se pone verde y grande, y le salen raíces pequeñitas
The "worm" grows and becomes green, and small roots apear

Ah, y esa raíz no es una raíz, es el tallo
Ah, the root is not a root, is the stalk

Sigue creciendo
It keeps growing

El tallo sube, las raíces se hacen más grandes, y el tegumento se abre (la cápsula blanca). Por cierto, preguntadle a los niños qué es el tegumento, seguro que saben deciros lo que es.
The stalk grows, the roots get bigger, and the tegument opens itself (the white capsule). By the way, if the parens of my children ask them about the tegument, they will know how to explaing what it is for sure.

Del tegumento salen dos cotiledones. Los cotiledones son como unas mochilitas llenas de comida que trae la judía. Por eso no necesitamos tierra. Porque se mientras tengan agua y comida en sus cotiledones, pueden seguir creciendo.
Two cotyledons sprout form the tegument. The cotyledons are like small bagpacks full of food for the plant. That´s why we don´t need soil. Because as long as the plant have water and nourishment from the cotyledons, it can still keep growing.

Mirad qué bonita y qué grande se ha puesto.
Look how beautiful it became.

Los niños observan sus vasos cada día
Children were observing their glasses every day
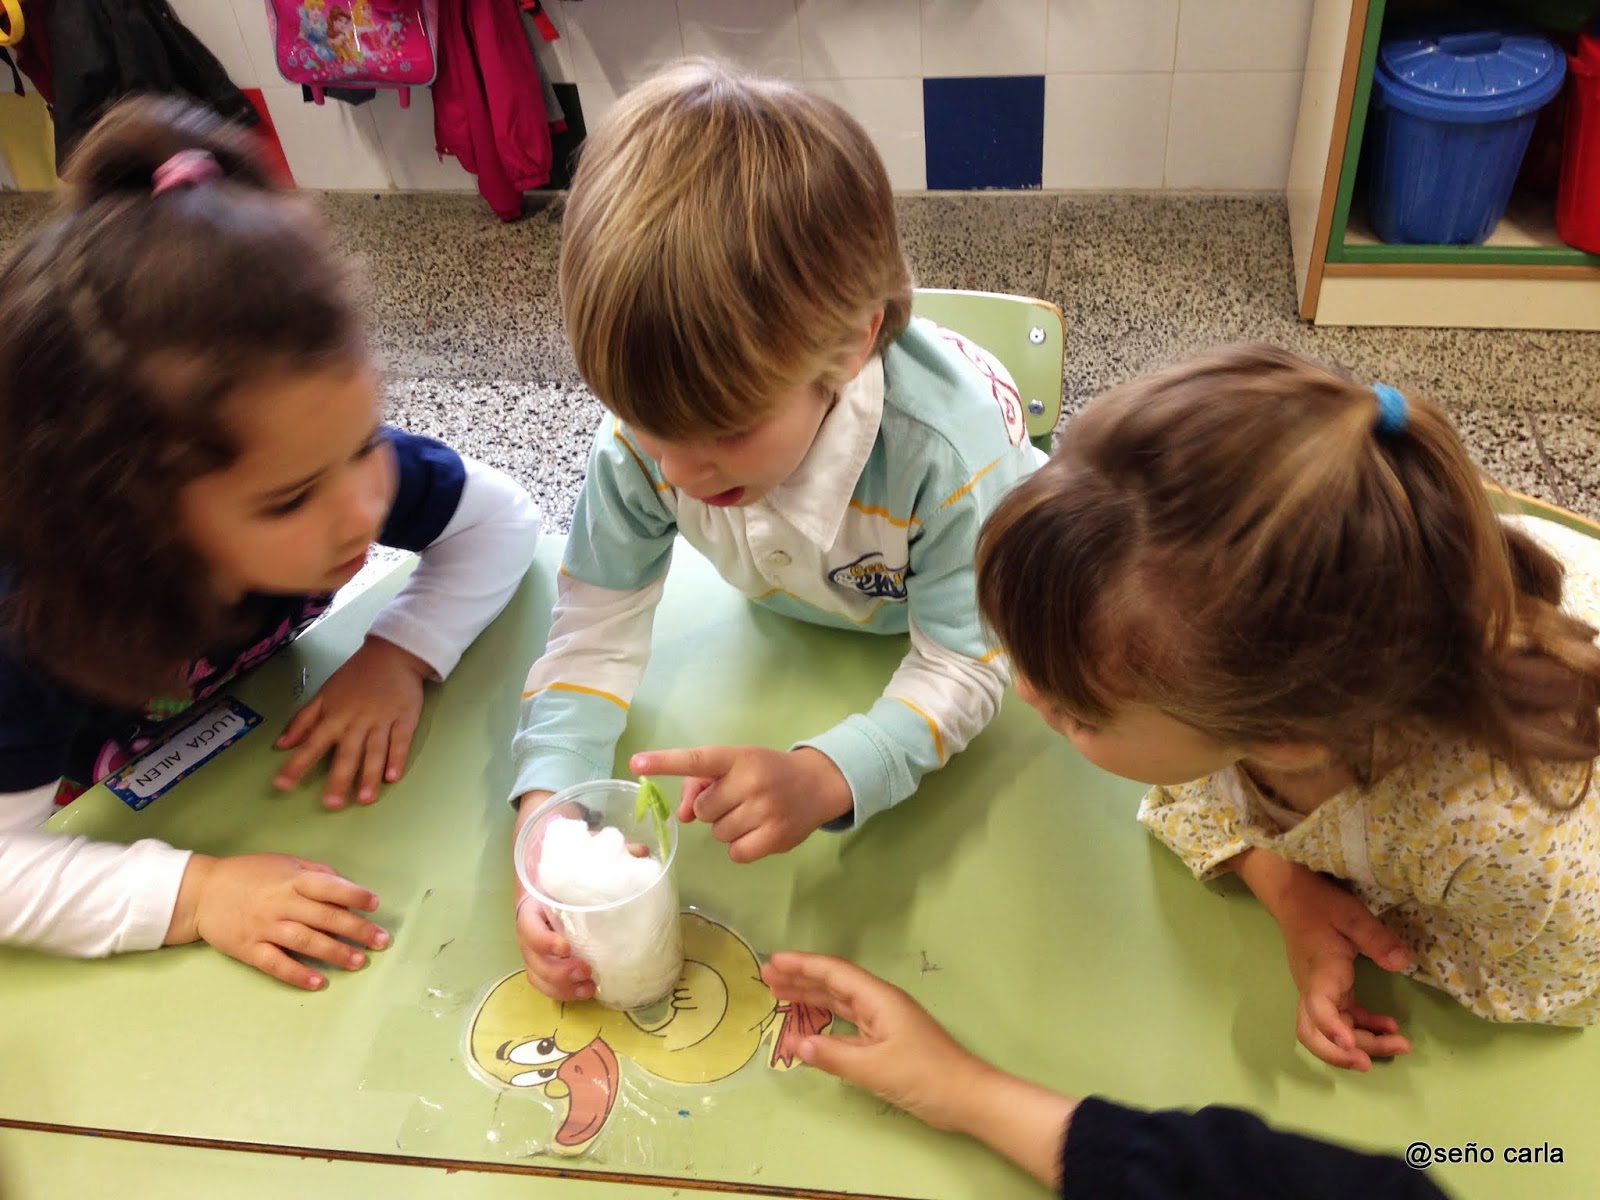
Y ven los pequeños cambios.
And see every little changes.

Dibujábamos el cambio en la pizarra.
We draw the change in the blackboard. (Bean-growed root)


Poco a poco van creciendo.
The plants were growing little by little.

Y las íbamos regando.
And we watered them.

Cada vez había más cambios.
There were more and more changes.


Se pusieron así de grandes.
They grew a lot.

Una de las plantas se gastó todo lo que tenía en los cotiledones (¿los veis secos?) y había que plantarla rápido en tierra o se moría.
One of the plants run out of its cotyledons food (can you see them dried up?) and we needed to plant it in soil as soon as we could or it would die.
Plasmamos todo el proceso en una línea del tiempo
We captured all the process in a time line

Los niños tenían que elegir entre varios fotos para ver cuál iba antes y cual después
Children had to choose between different pictures to place them in the correct moment.

Con esto se trabaja la secuencia temporal, observación de imágenes, número ordinales, lectura...
We worked temporal sequences, image observation, ordinal numbers, reading skills...

Aquí os dejo algunos vídeos jugando a elegir dónde colocar las fotos.
Here you have some videos playing where to put the pictures.
Daniel, que lo hace muy bien.
Mara, que lo hace también muy bien.
Plácido, a quien los compañeros felicitan con mucho cariño.

Felicidades por tu bolg! es de agradecer todo el esfuerzo e ilusion que transmites en lo que haces. Un ejemplo a seguir!!! Animo y mucha suerte!!!
ResponderEliminar¡Muchas gracias Eva!
ResponderEliminarEsta Actividad ME ENCANTA... en el Curso que sea. Ver los Seres Vivos, Nacer, Crecer y... bueno, si son mayores, Reproducirse. Es que luego llegan a Secundaria sin SABER qué son las Flores...
ResponderEliminarCREO que para el Desarrollo "Sano" de la Personalidad (entendida como la "capacidad de entender el Mundo exterior y actuar conforme a unos Objetivos"), es muy importante la "Vivencia" del Desarrollo Natural de los Seres Vivos, ya sean plantas, como "Criar unos ratones y verlos crecer". Si NO, sólo habrá "vivido" un "Mundo Mecánico, Virtual" y No podrán entender ciertos aspectos de Nuestro Mundo, que les afectan y con los que interactúan.
En Secundaria hicimos "hongos"... Se puede hacer en ciertos entornos distintos (echando sal, tapándolos del exterior, variando la temperatura y luminosidad...).
ResponderEliminarEn un Medio Rural se pueden hacer fácilmente: Casitas de Pájaros, con una caja de Fresas...
(Soy el de antes, el del mensaje de arriba).
Gracias por tu comentario. Me parece muy interesante tu propuesta sobre los hongos. Investigaré sobre el tema, a ver si se pudiera aprovechar para el nivel de Infantil.
ResponderEliminarUn saludo.
Precioso! Me encanta 😍
ResponderEliminar